Learn about the 6 steps to design your kids bedroom changing it into something that they will be going to love and keep in the heart all their life.
It is about conception, sketch, ideas, put into practice.
This project took two weeks of continuous work and got finalized with a big wow on Rooman’s part. I will get you through all the process hoping that will inspire you and encourage you to look for a designer or to be aware of a few details that are going to help you if you start on your own.

The first step I consider always to be the first meeting with the client, the best place at his house.
After an hour of conversation with Fatima, about her daughter’s needs and preferences and after taking notes with all the necessary room measurements I was ready to begin the new design project for this bedroom.
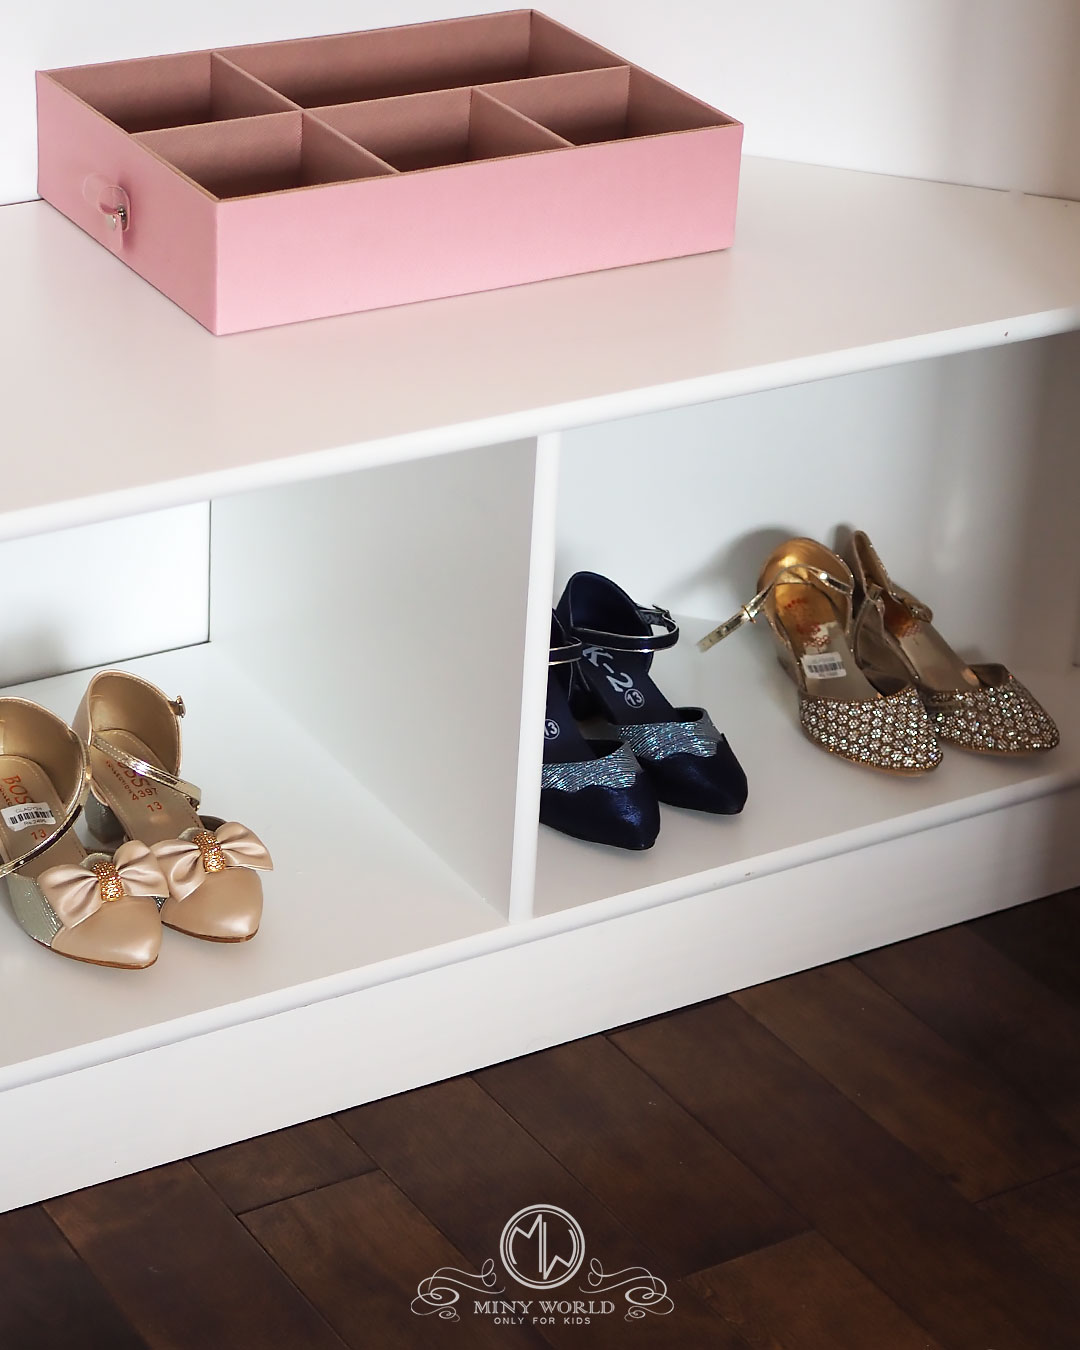
Rooman, at 5 years old loves almost everything: ballet, dancing, unicorns, makeup, princess, you name it. She needs a relaxing aria, a study station, a play with the dolls space, and a nice spot in the wardrobe to display her beautiful dancing shoes. And do not forget about the mirror, she loves makeup!
The second step is finding the theme,
an idea that binds everything together in a composition. Where do I start, I asked myself? The answer was so close, right there in front of me. 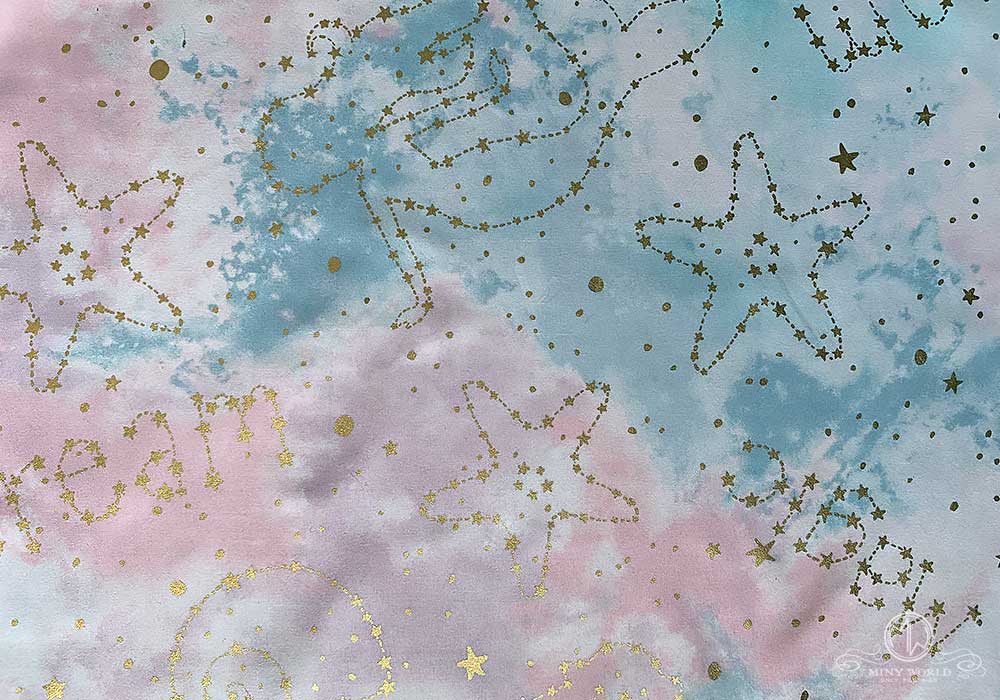
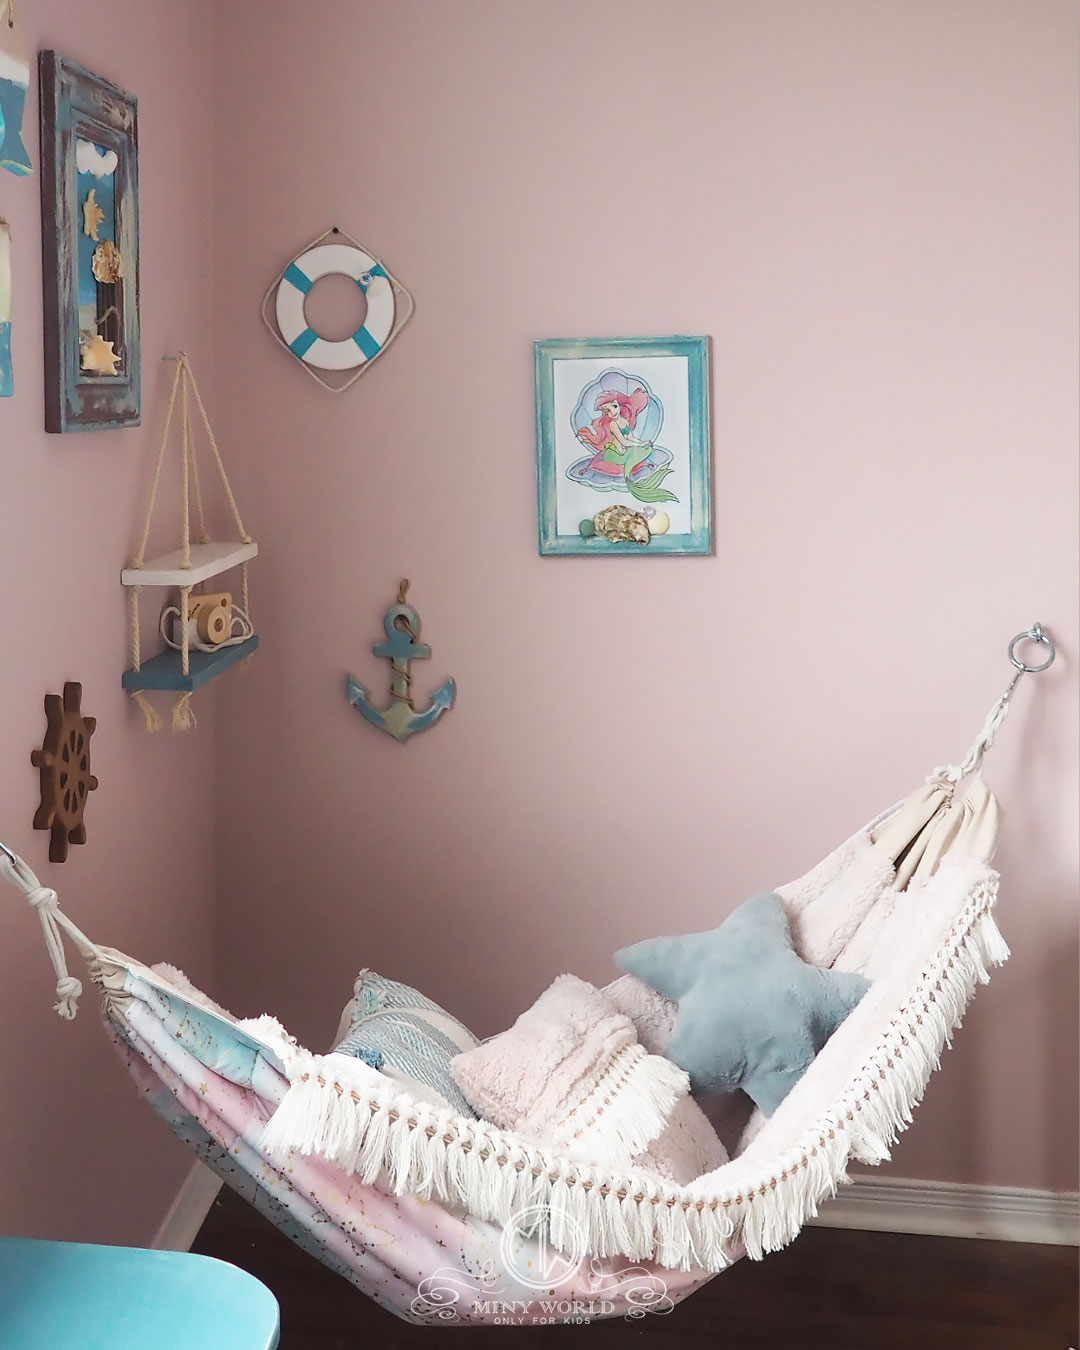
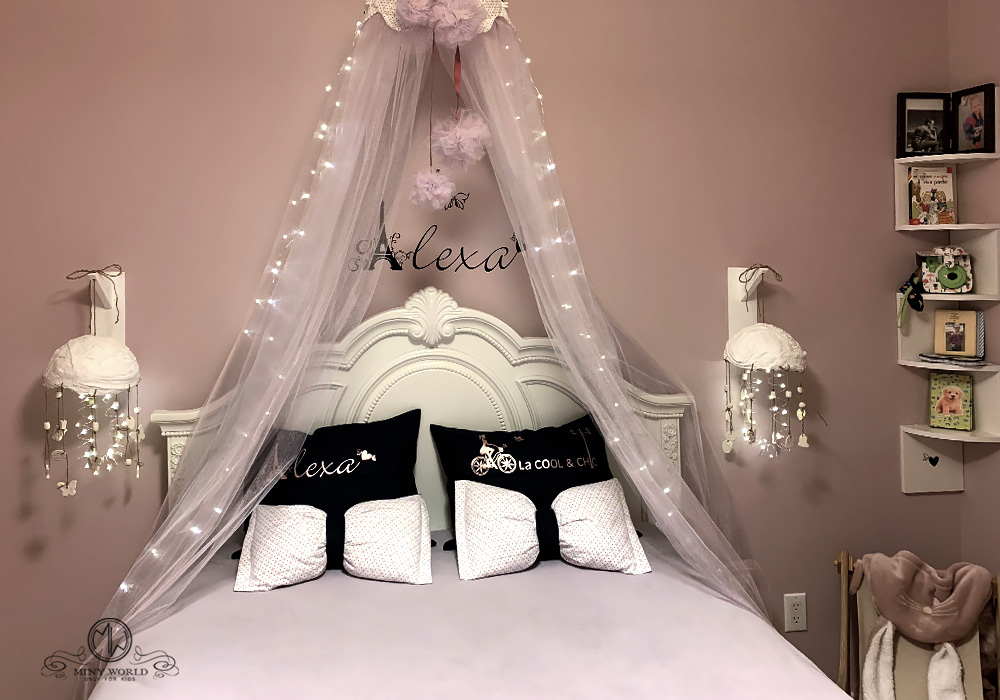
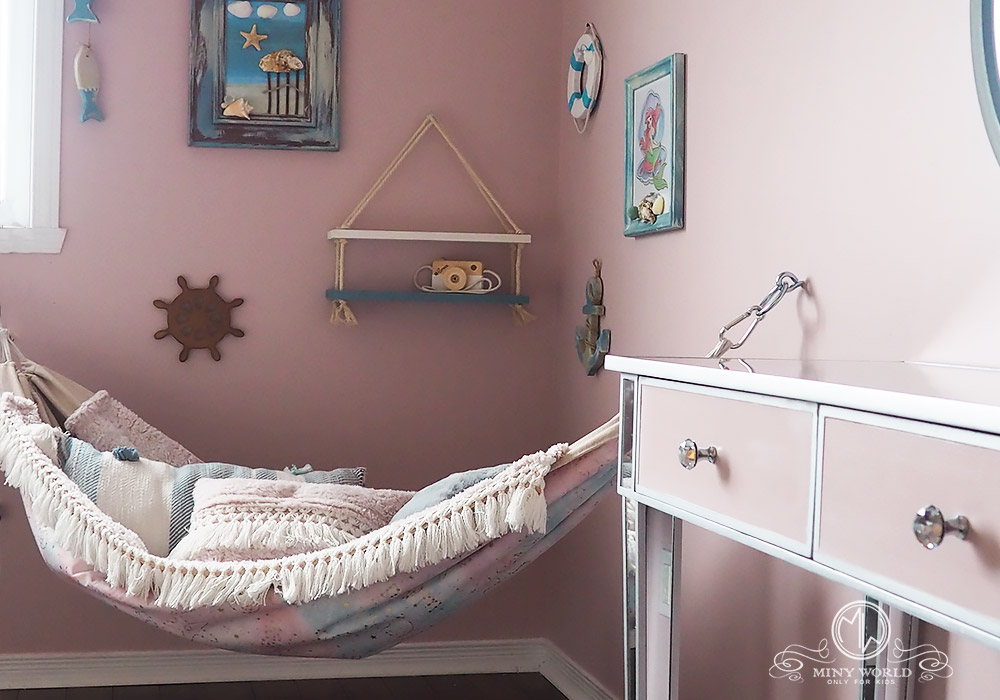
From the mermaids! A canopy was bought before, to decorate the room, but when it arrived home was not that appreciated. It was probably the big size of the canopy comparing with the small room that got everyone scared. The fabric was opaque, crumpled and not much was to be seen, so Fatima thought that is not a keeper. But I do not give up so easily on things. I took it with me, ironed it, and big surprise: golden contours of stars and mermaids over beautiful tones of pink and turquoise. A lot of fabric in my hands, four big panels just to play with. I called Rooman’s mom, and I asked about the mermaids and the ocean? What do you think? The little girl’s favorite princess is Ariel and so is mine. I love the ocean with all the life beneath, the shells, the calm feeling brought by the breeze.
When you have a theme, you have a start, you have a project. And from here everything flows. The colors, the accessories, the accents, and the details. I spent two days and a half with the project on my computer. Planning, drawing, searching for inspiration. I presented the project and after the acceptance with a big yes, I went further.
The third step was one full day of shopping
searching a few stores for blankets, lamps, mirrors, other small accessories, and materials like wood and hardware. I did not have a hundred percent clear idea of what precisely to buy, so I let myself dive in, buying some beautiful items because they seemed to me exactly right.


The fourth step was choosing the wall colors
according to the accessories. I knew that will be pink, taupe, and turquoise but for the right shades, you must wait for the rest of the items in the room to make the perfect match.
Rooman’s room is relatively small, 12.5 square meters, and because the walls did not necessitate only a few small reparations, I painted it by myself with the help of Irene, my daughter who always likes to give a hand. In one day, everything that was red, flash pink, and white became taupe, neutral pink, and creamy white. What a change! The whole atmosphere got calmed and peaceful.


We are getting to step five, the longest, and where the hard work is happening.
One of them is drawing the project for all the wood parts, prepare some of them for CNC.
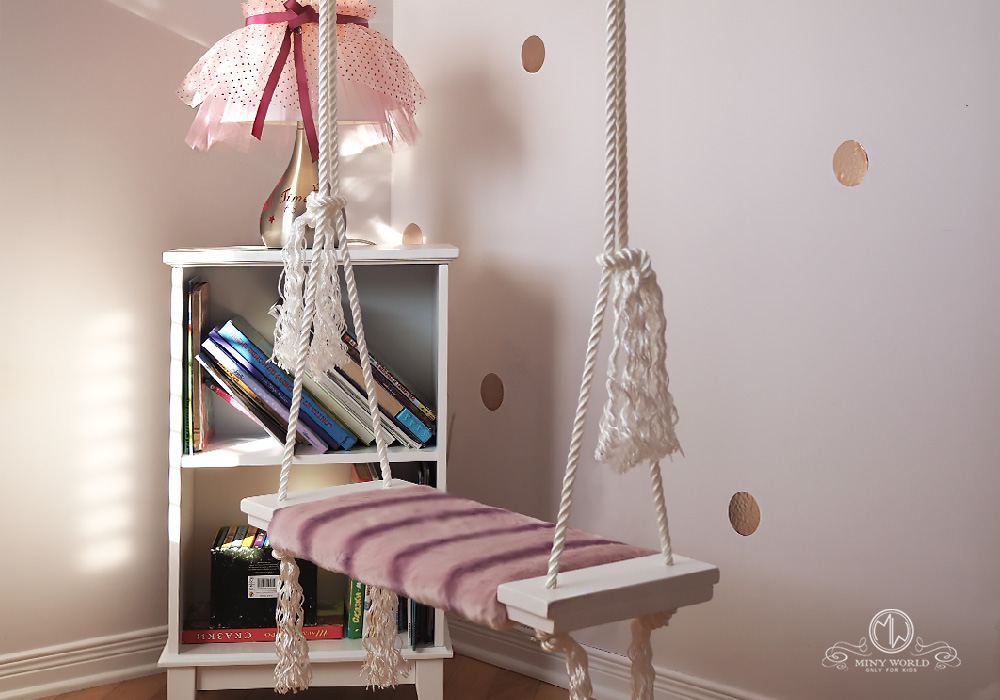
The curved shapes, especially the ones very detailed were cut with a router machine. The corner support, in the shape of a seahorse, under the desk was a wow hit even for me, not to mention my new little client and her whole family.


I was able to cut and craft in the workshop the dressing unit, the desktop, and the base of the dollhouse. I enjoyed all the process since I was able to put into practice my creativity.

Finding and matching little accents
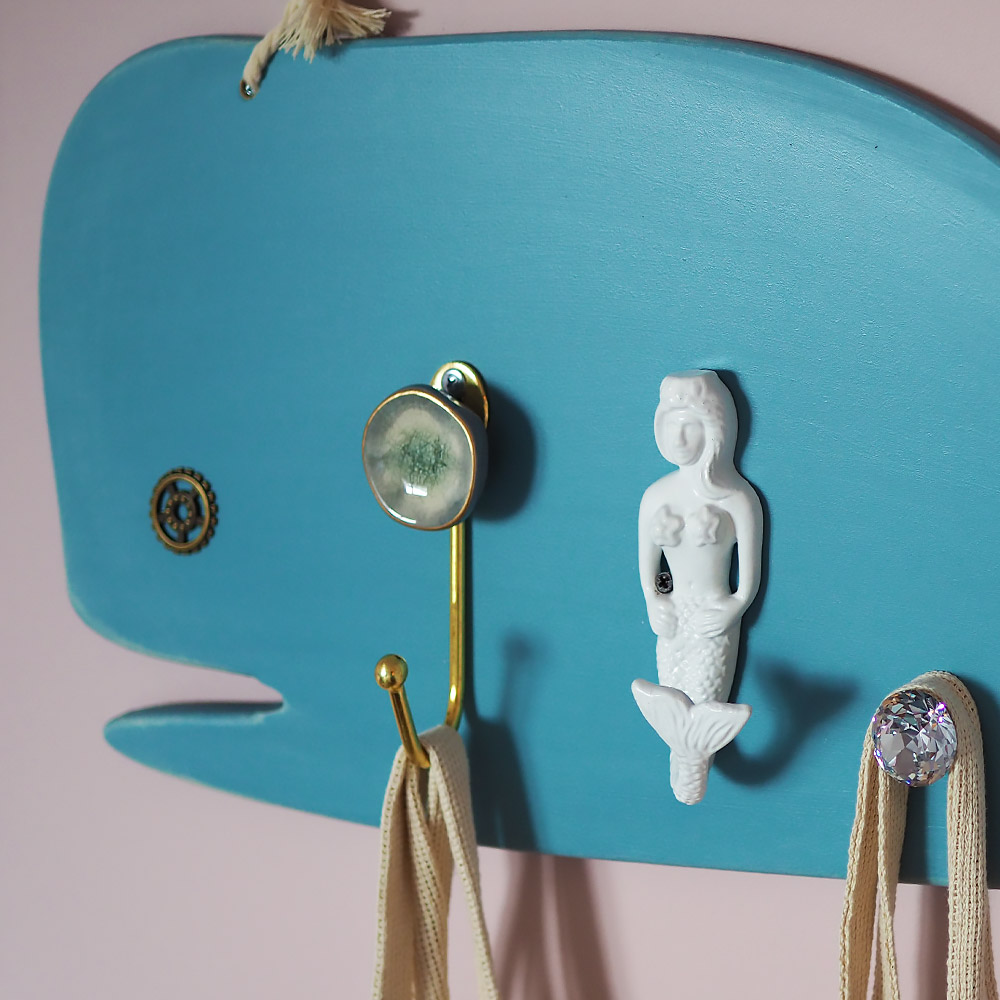
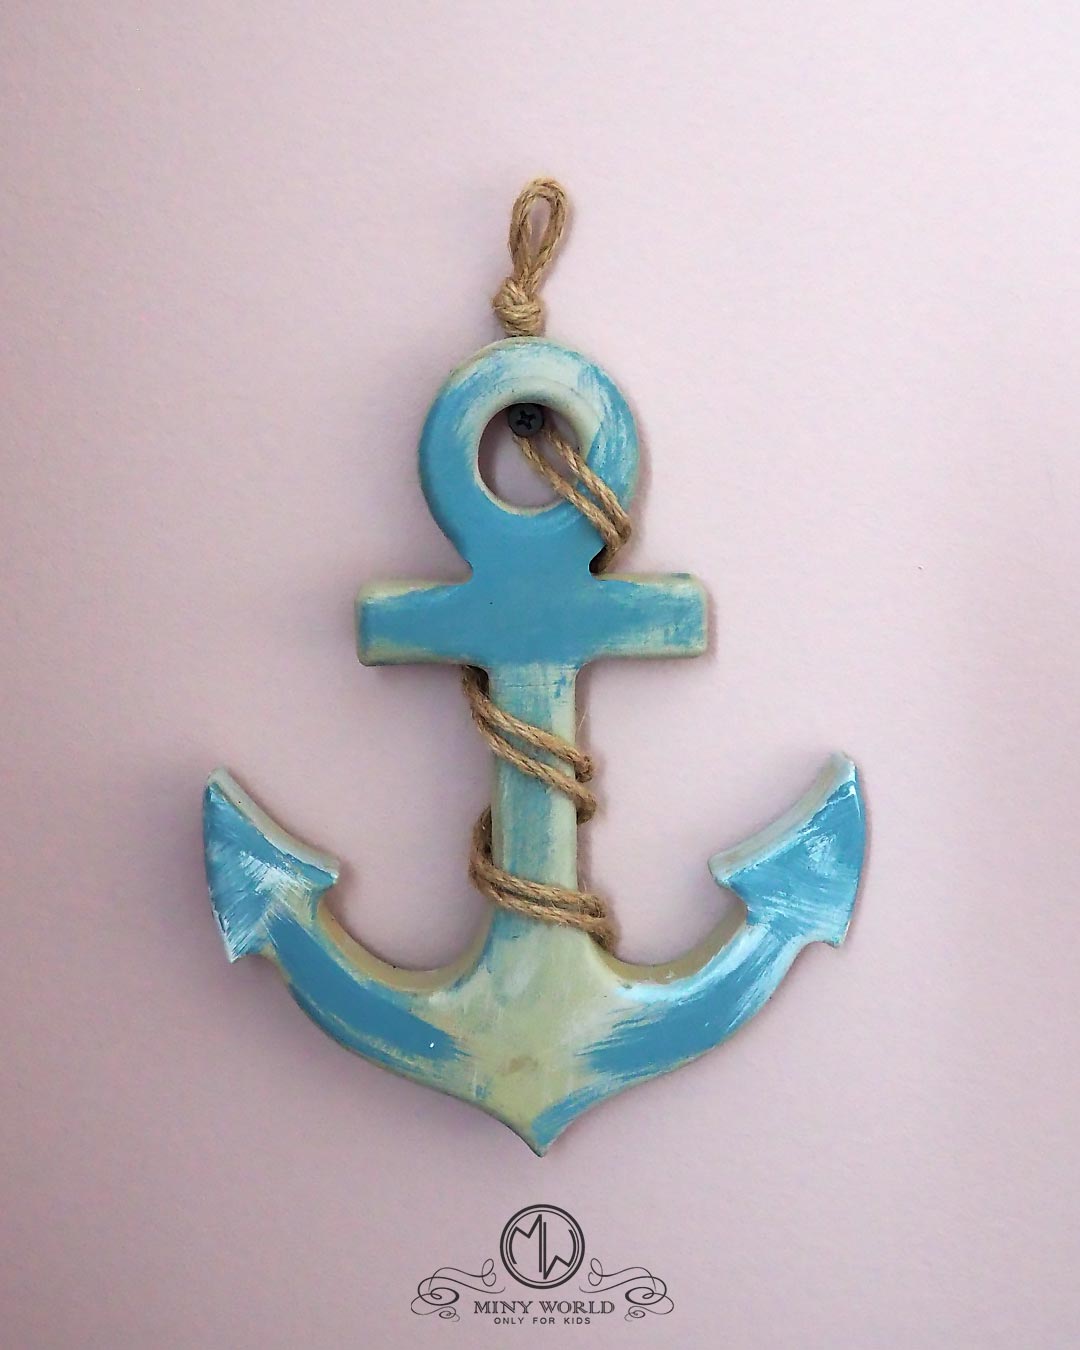
like the crystal buttons and the beautiful mermaid and turquoise stone for the wood whale hanger was so fun.

I chose to draw the dollhouse on the wall. We made a little bit of economy since we were on the budget, and we did not occupy so much space on the top part of the room, letting more aria for breathing. A desktop was created right there, attached to the dollhouse, creating an ergonomic work/play station.


Sewing was also fun.
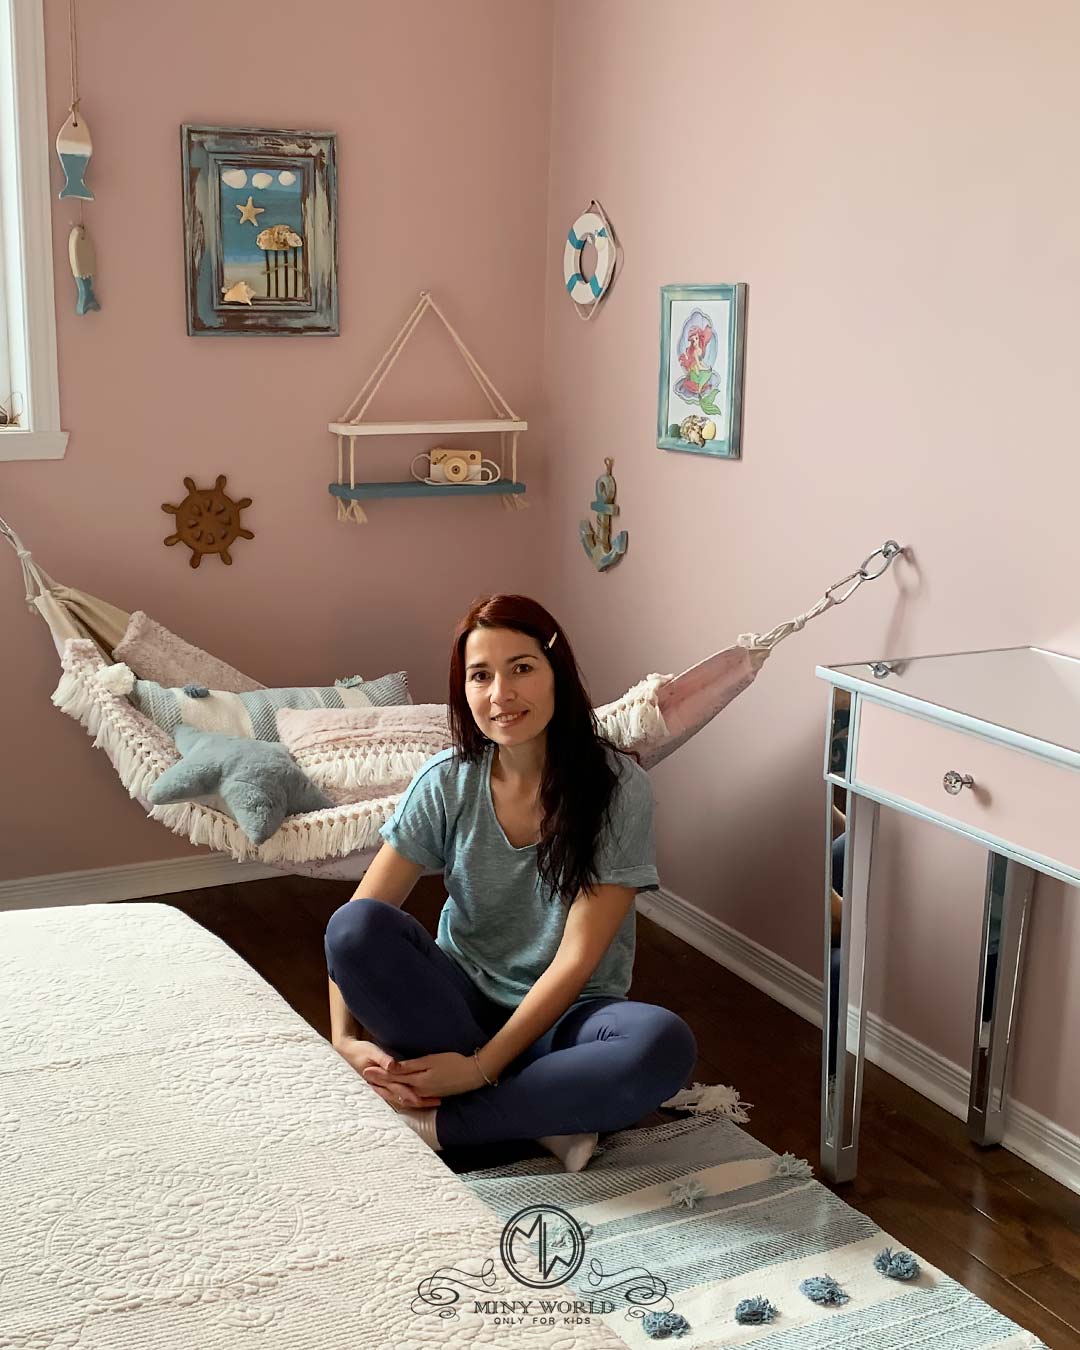
The four panels from the canopy, nicely ironed were enough for a flat sheet, two pillow covers, the back of the hammock, and a little scarf for the window treatment. With the blanket and the shames set that I bought from Tahari, they formed a nice combo.
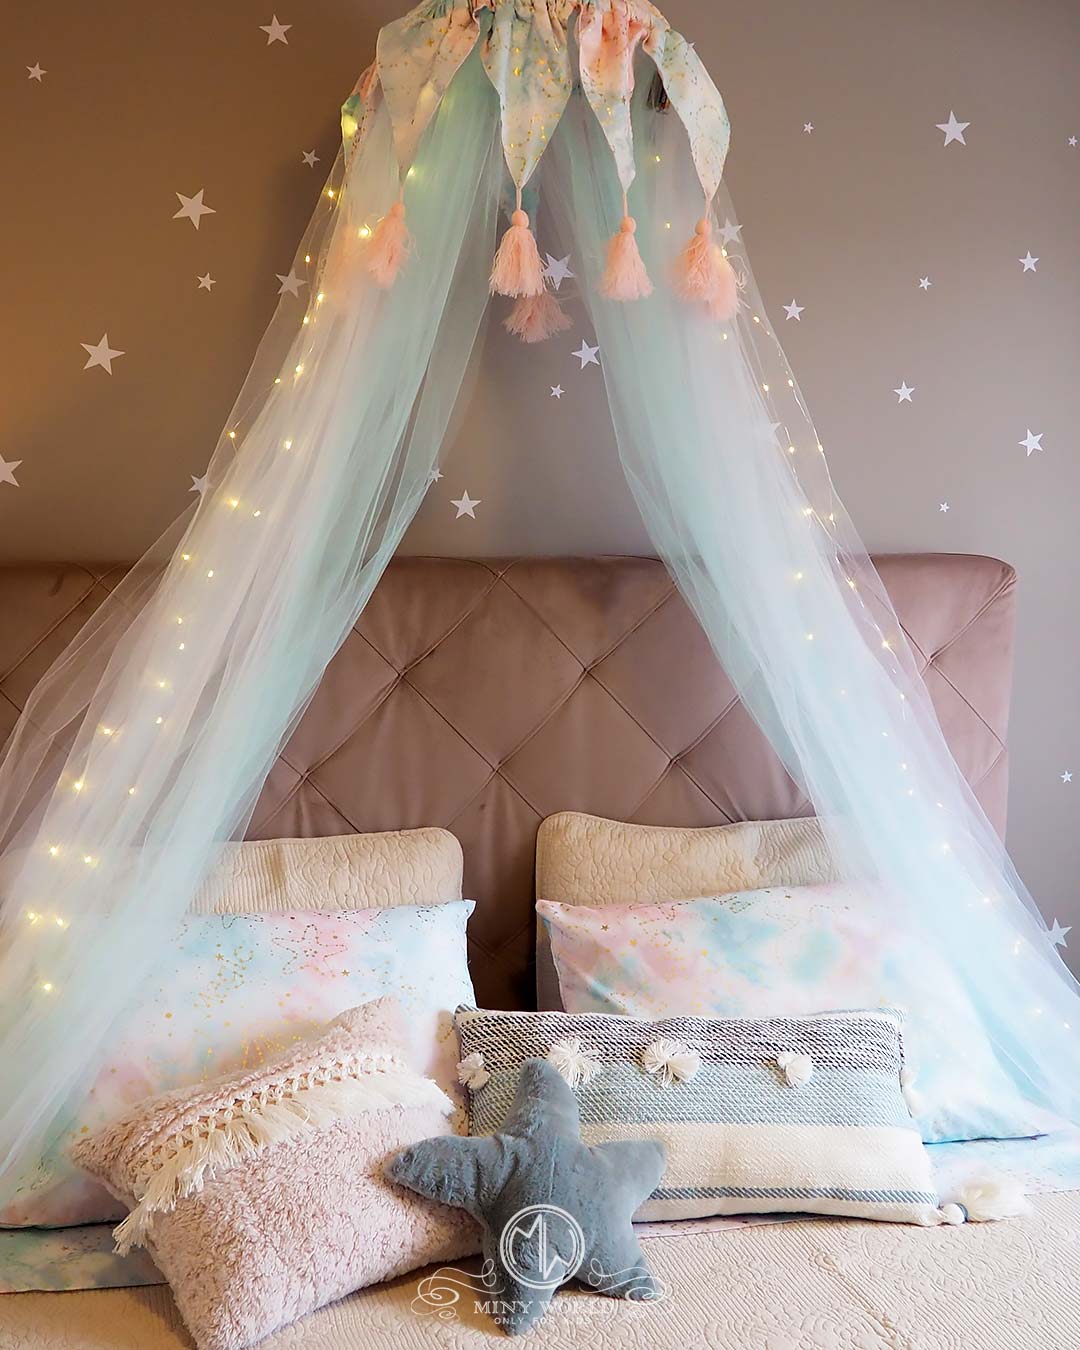
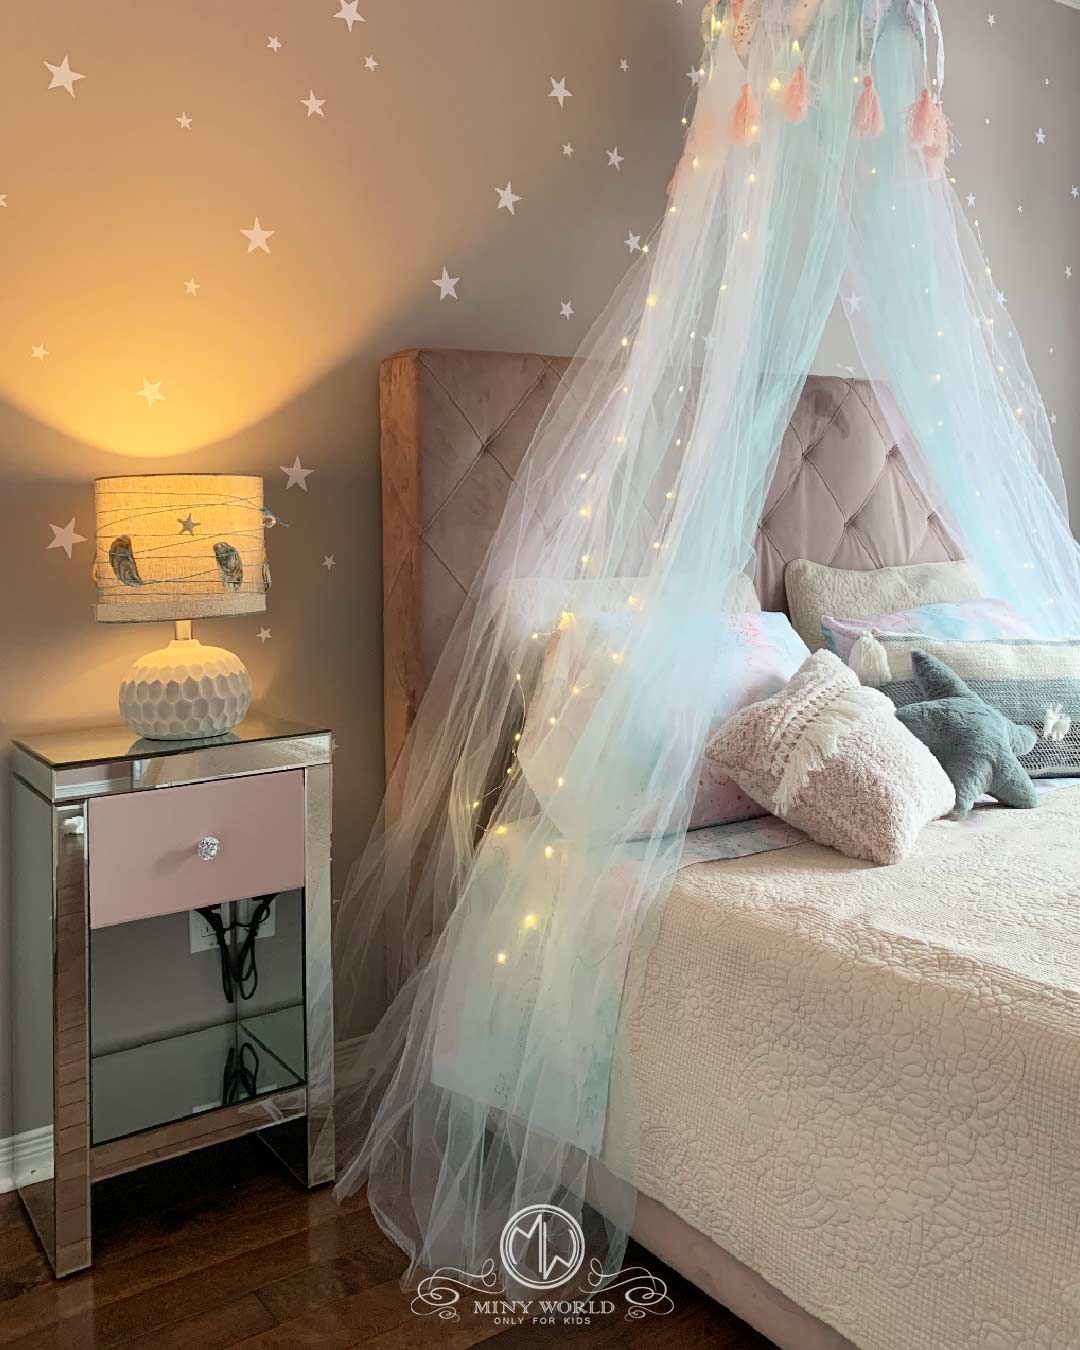
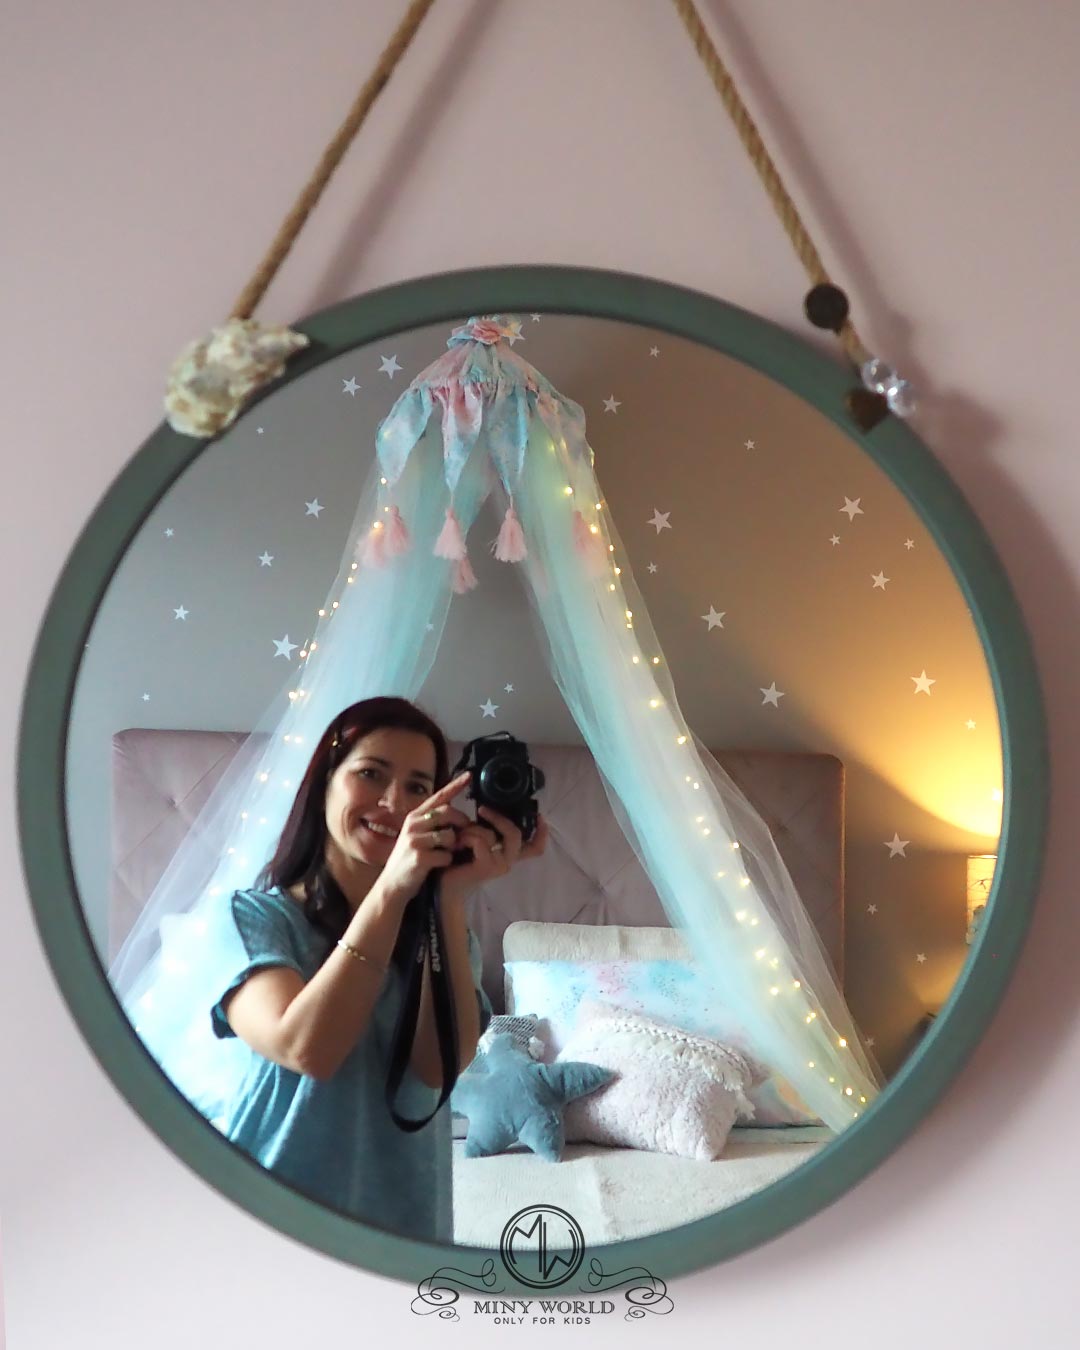
I kept the top part of the canopy, I shrunk it a little bit and I replaced the opaque cotton panels with white and turquoise transparent tulle, adding twinkle lights on the sides.
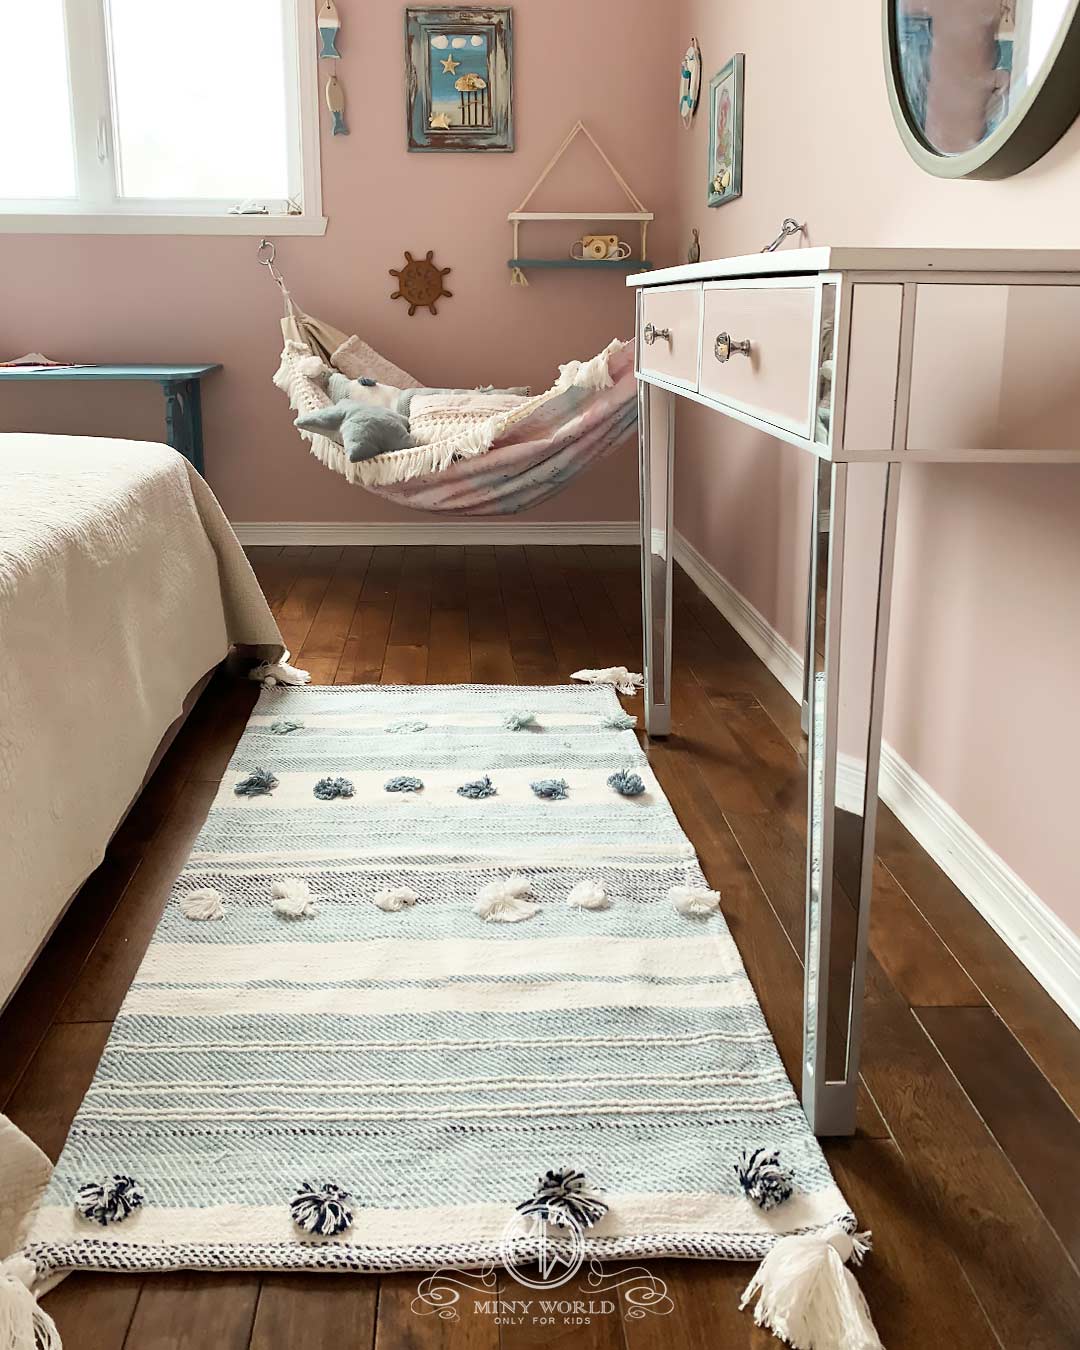
Another two assorted blankets were cut in pieces and made a few decorative cushions, the top layer of the hammock and the carpet.

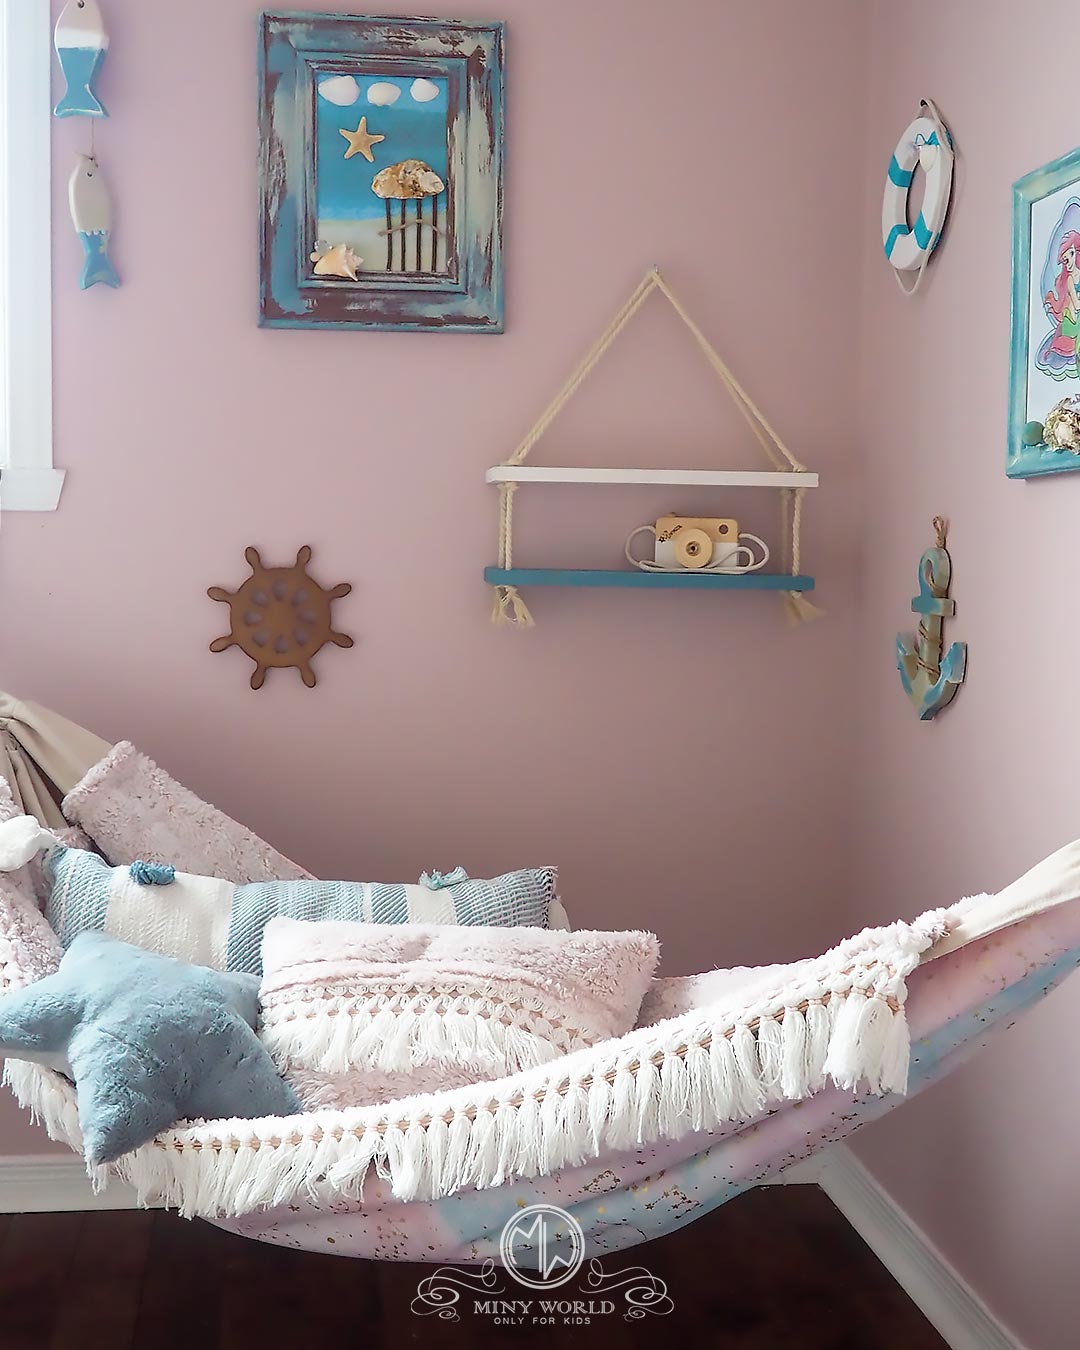
Also, from the blue fluffy blanket and a plastic chair was born the octopus tabouret, of which I am so proud. I will try to show you this DIY in a new future blog and link it here. Very cozy, the tabouret offers warm, soft comfort under the feet, against the floor. From the spare fabric, I sew three nice cushions, one square and two in a star shape.

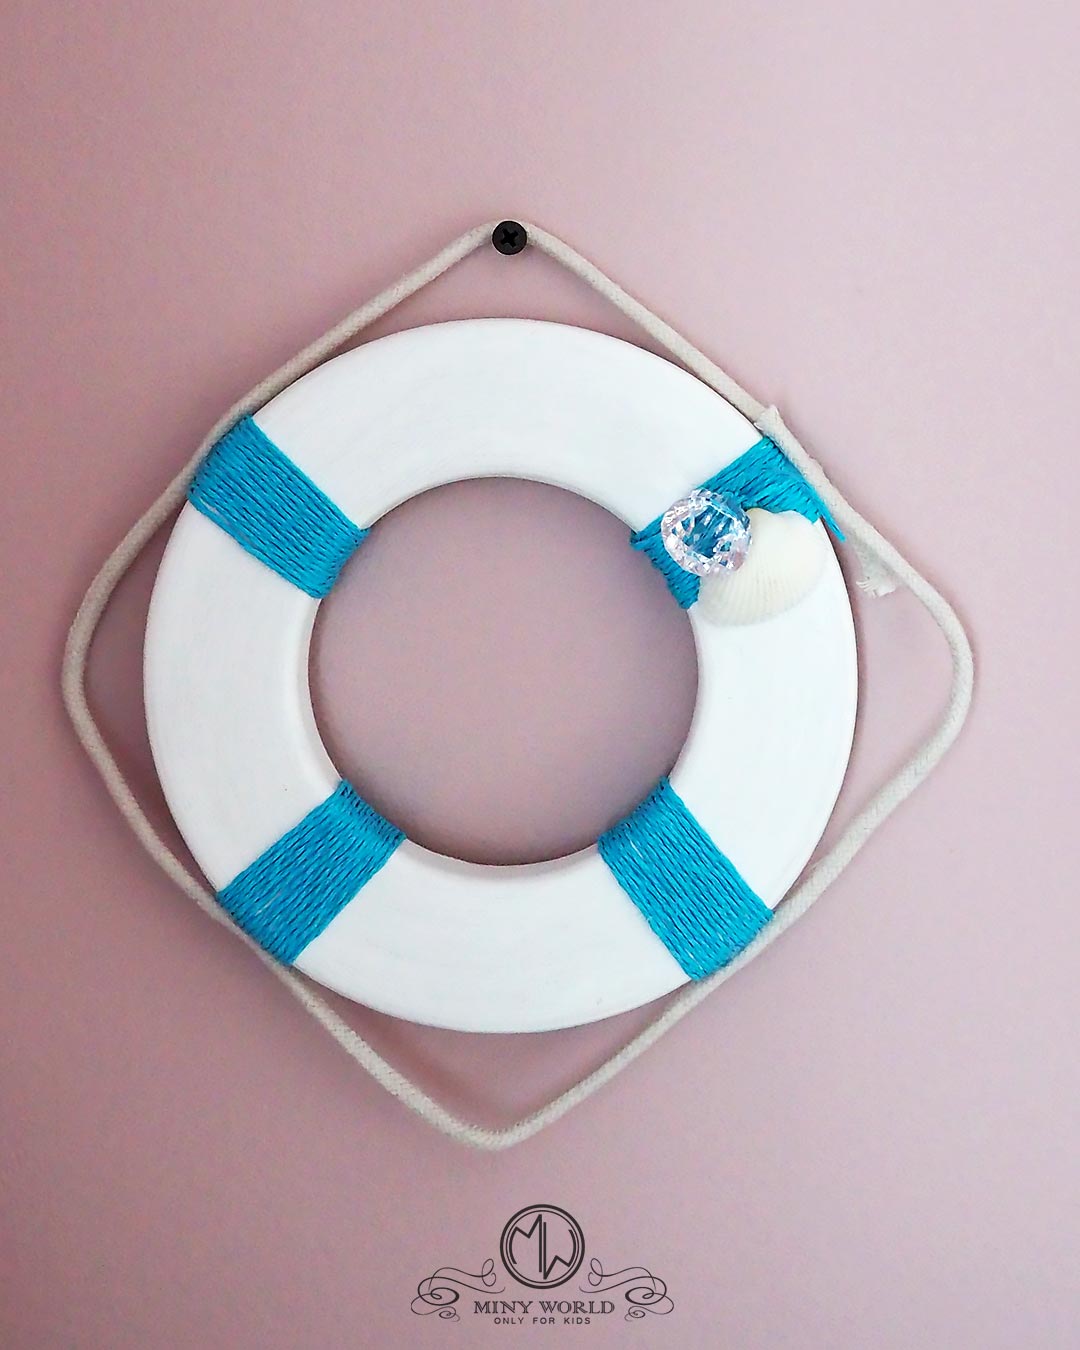
A little bit of creativity was combined with the pleasure of making a few accessories for the wall decorations.
A boat wheel, a lifebuoy, a framed drawing with Ariel, and a nice, cute artwork with shells and diamonds.

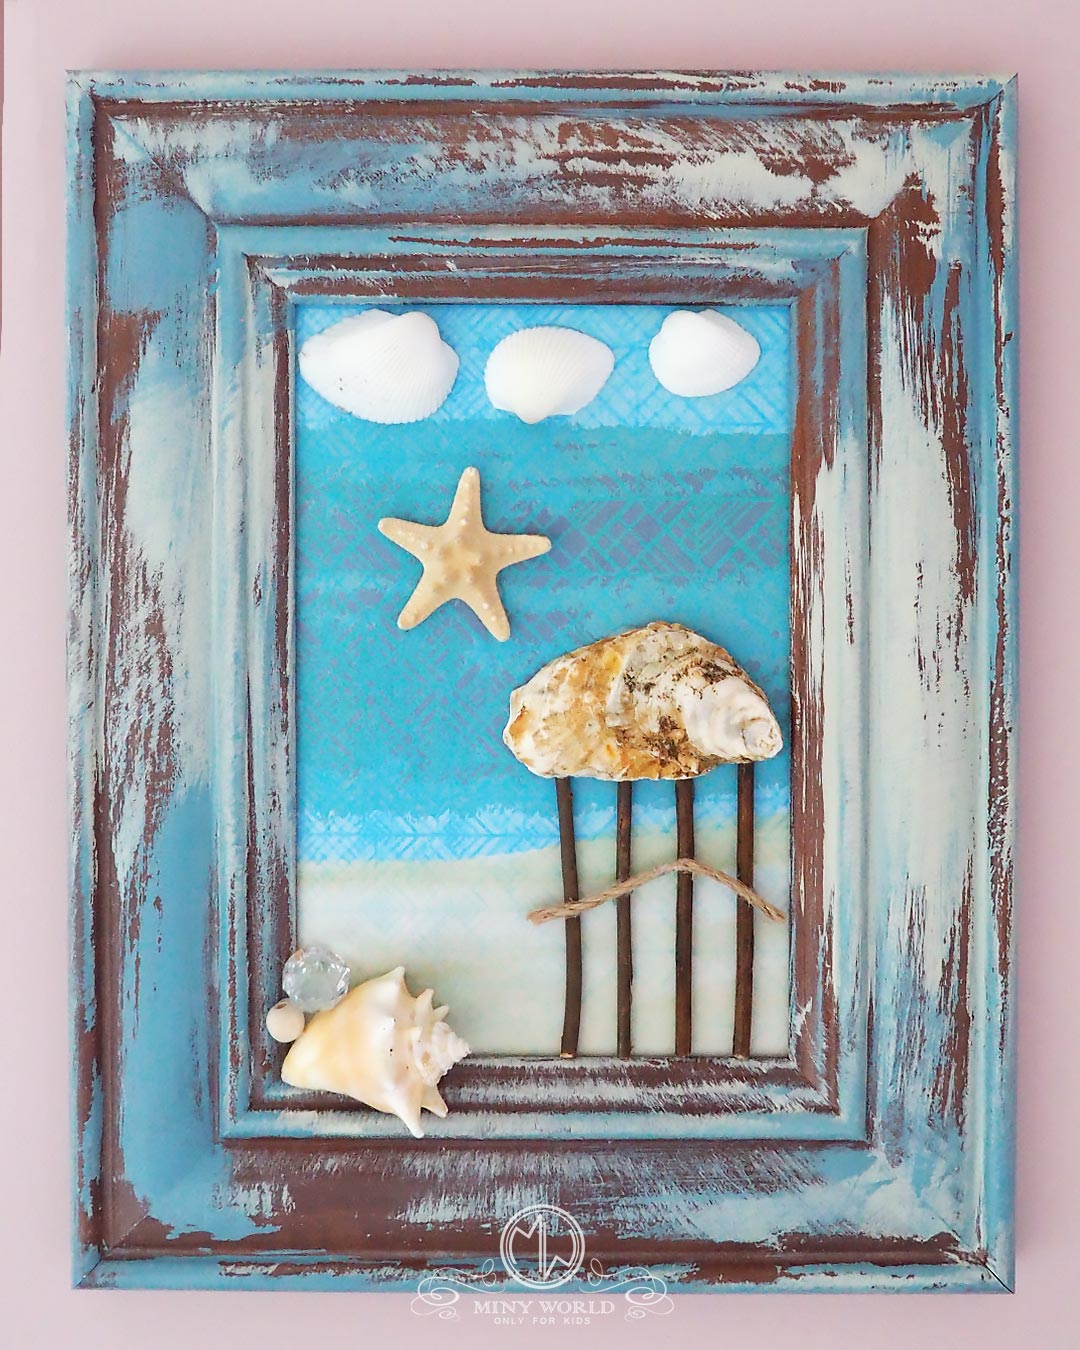
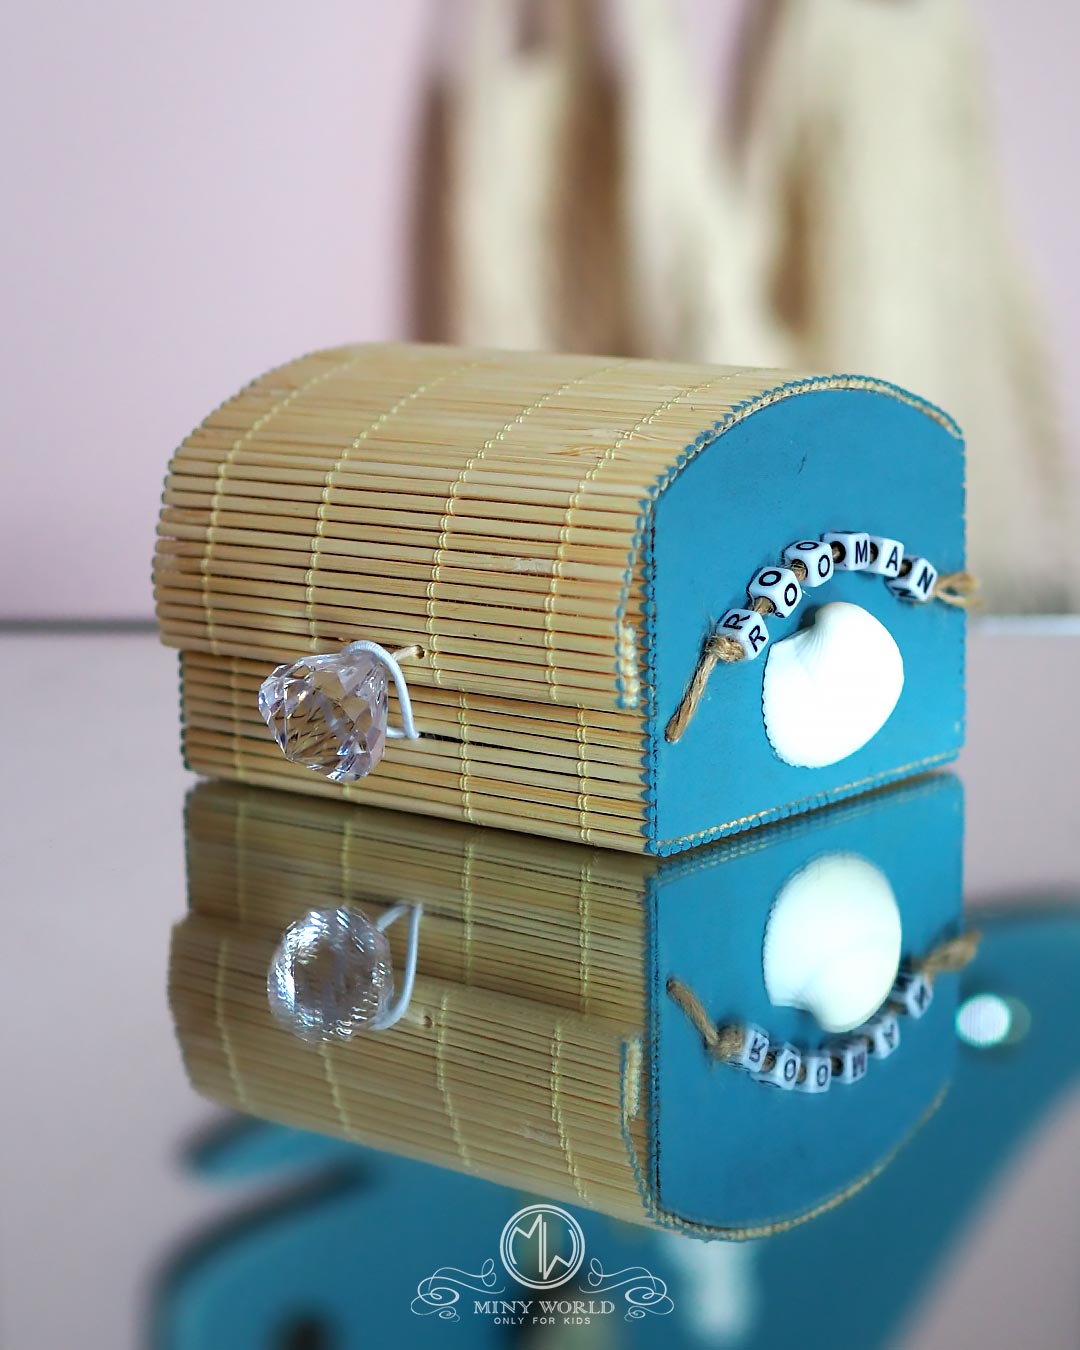
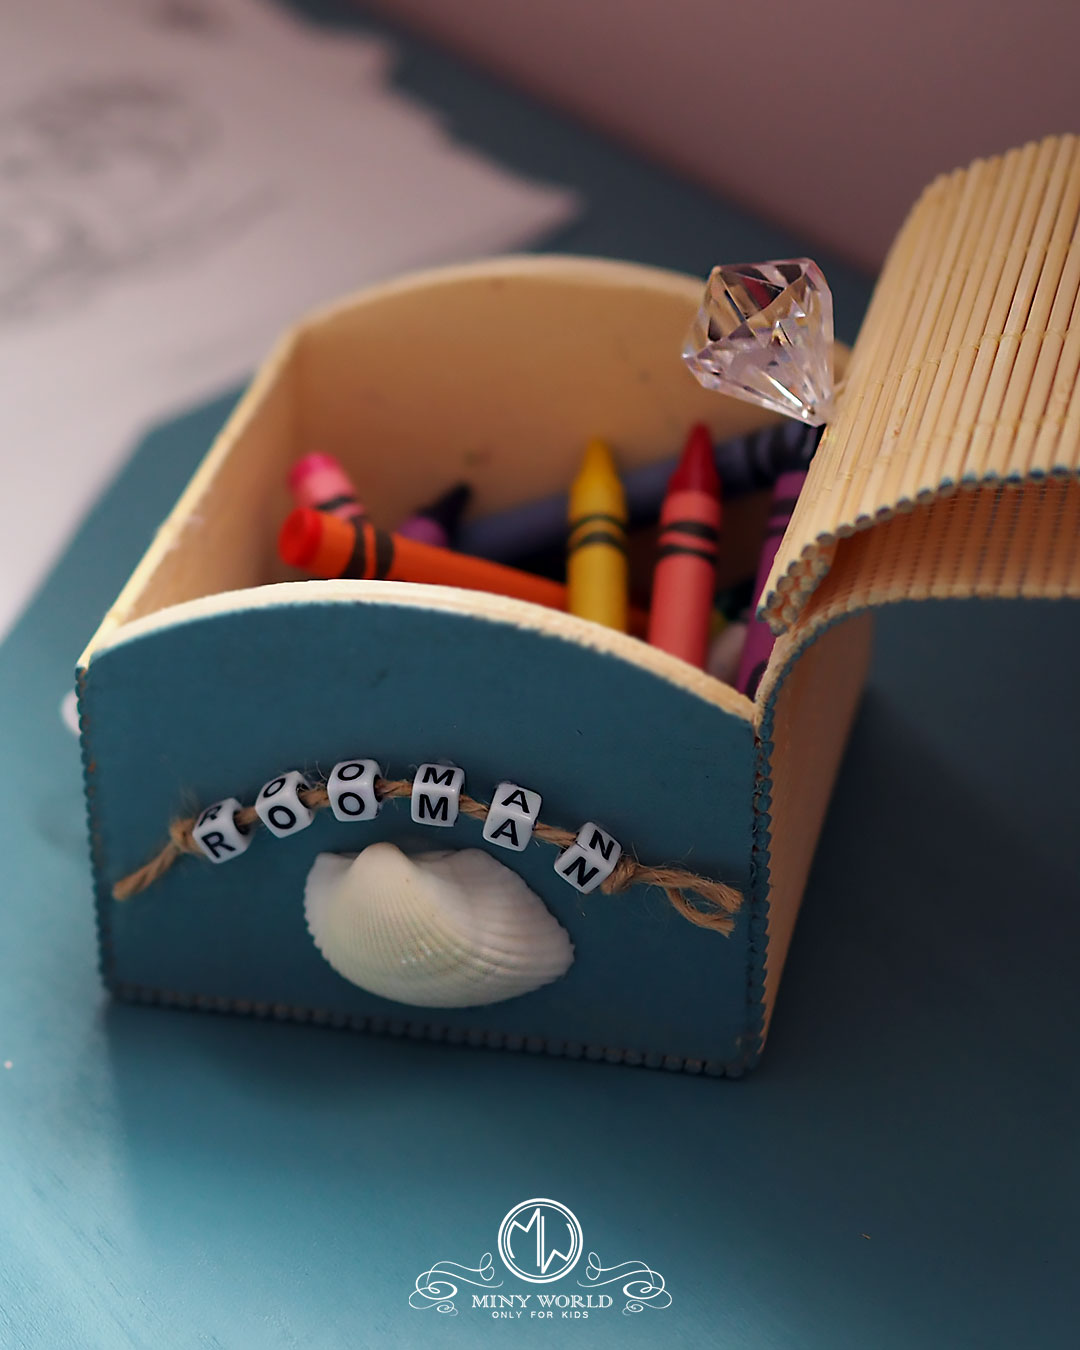
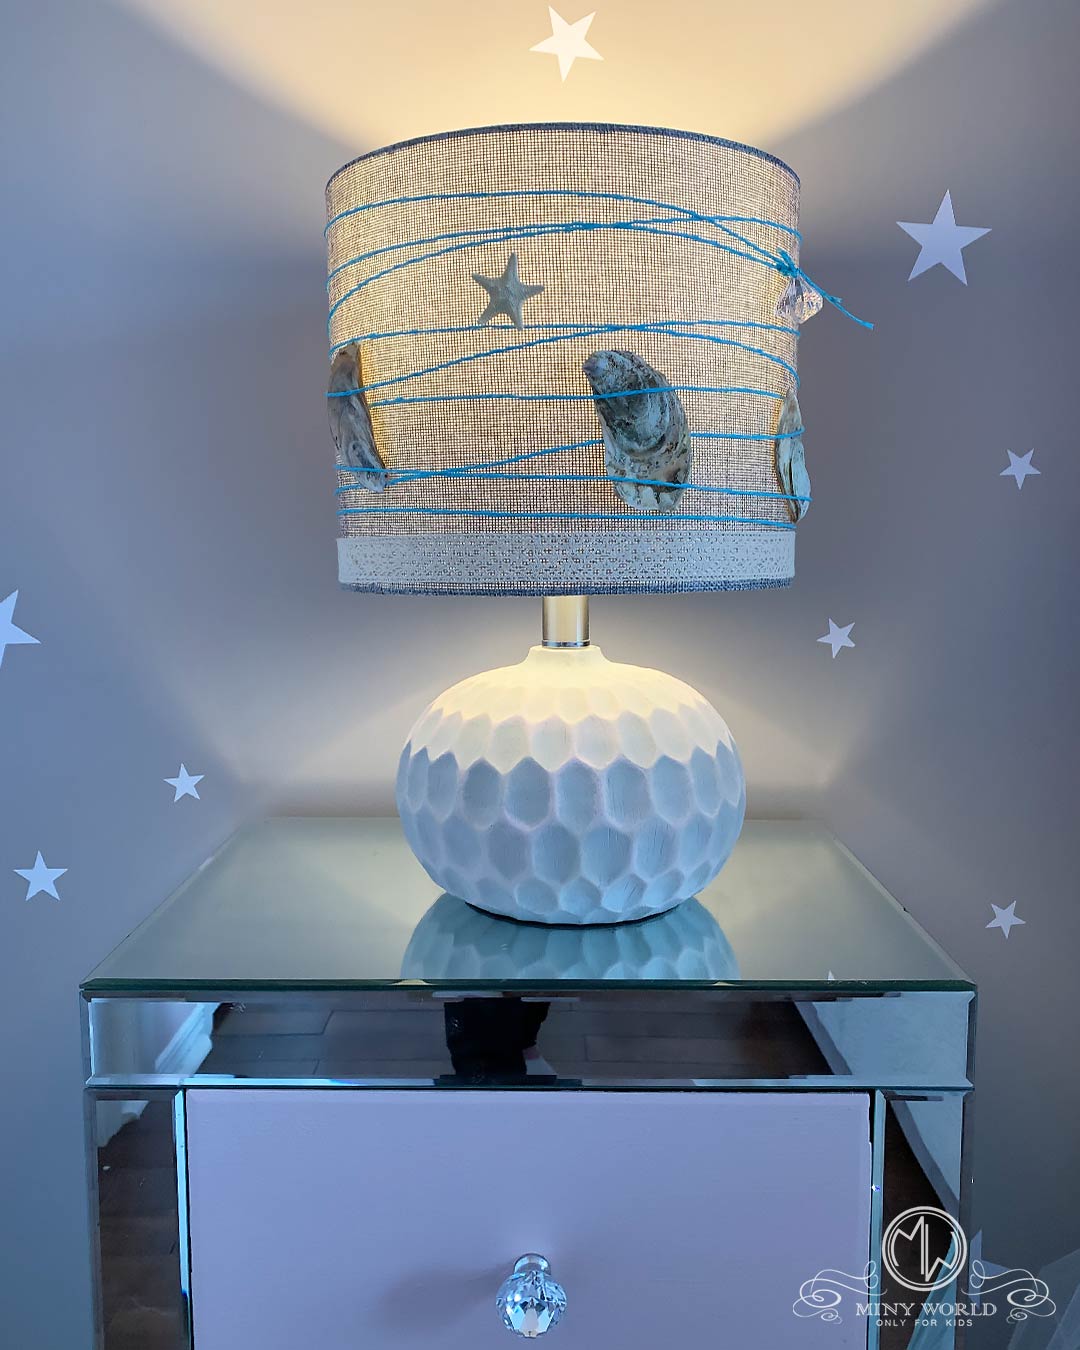
I used shells and diamonds to decorate a treasure box for colour pencils, the mirror and the lamp, to which also I brought a touch of pink shades on the base, using the same pink from the walls paint.

And last, but not least was upcycling the furniture.
I painted the drawer facades. I forgot to mention that the mirror from the nightstand table and the makeup table was broken so I decided to cover them with pink paint and change the buttons, with shiny new crystals.
Well, nice and slow we arrived at the sixth step, the last one. The day of setting up the whole stuff.
A ton of emotions. No-one scooped until everything was done. And the wait has worthen. Everybody was impressed and so grateful including me.

Hope everyone liked the story, the bedroom design, and the whole handmade furniture and accessories. A part of them I will be able to reproduce, so you can buy them for your kids. Check our MINY WORLD online shop. Other items personalized with fabric like the hammock, canopy, and cushions can be ordered with different materials depending on your choice and what the stores have to offer. I am always at the other end of the phone or of the email, ready to assist you and be part of these magical adventures that change our little ones’ life for the better, offering them a suited environment for growth and their needs.
Let yourself inspired and ask for help anytime you need it.
Kindly,
Mihaela
Error: Contact form not found.